pixateを使ってみる
iOSのデザインをcss likeに書けるPixateよさそうだけど、
お値段が結構するなーと思って素通りしていたんですが
Non-Commercial版が無料で出たので使ってみました。
Getting Started
Getting Started
これに沿ってやってみます。
準備
0.Pixateのダウンロード
1.新規プロジェクト作成(storyboardは無し、use ARC)
2.Round Rect Buttonを配置
titleを My Buttonに変更
3.xibのautolayoutのチェックをOFF
Pixate自体はautolayoutはサポートしているけど、ここではとりあえずOFF。
4.ダウンロードしたPXEngine.frameworkをXcodeプロジェクトに追加
5.TargetのBuild Settingsを修正
Other Linker Flags:-ObjC
にする。
6.AppDelegate.mを修正
#import <PXEngine/PXEngine.h>

// application:didFinishLaunchingWithOptions:に追加
// この行はライセンス購入者用。無ければPixateのsplashが表示されます。
// [PXEngine licenseKey:@"License Serial Number" forUser:@"License Name"];
デザイン定義
7.User Defined Runtime Attributes
Key Path:styleId
Type:String
Value:button1

(余談ですが、User Defined Runtime Attributes使ったことなかったんですがいろいろできそうです。)
8.どこでもいいのでdefault.cssを作成する
例:Resourcesフォルダ
#button1 {
    background-color: yellow;
}
9.css修正
#button1 {
    background-color: yellow;
    border-width:     2px;
    border-color:     black;
    border-radius:    8px;
}
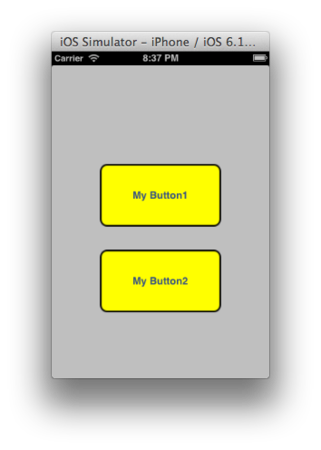
角丸めっちゃ簡単。CALayerいじる必要なし。
補足
ちらっとリファレンス見たところ
通常のCSSセレクタのようにclassも定義できます。
CSSセレクタっぽく
10.User Defined Runtime Attributes
Key Path:styleClass
Type:String
Value:button

11.ボタンを複製
12.css修正
.button {
    background-color: yellow;
    border-width:     2px;
    border-color:     black;
    border-radius:    8px;
}
要素指定っぽく
また、ボタン全体に定義する場合はUser Defined Runtime Attributes
に追加なしで、default.cssでbuttonを指定すればOK。
button {
    background-color: yellow;
    border-width:     2px;
    border-color:     black;
    border-radius:    8px;
}
感想
かなりいいです。導入も簡単。
あとは、複雑なUIでパフォーマンスに影響がないかどうか
みたいなのが気になるところです。
欲しいなぁコレ。


